


AutoCAD 2008 User's
Guide > Create Realistic
Images and Graphics > Render 3D Objects
for Realism > Advanced
Rendering >
Benefits of Indirect Illumination
Indirect illumination techniques, like global illumination and final gathering, enhance the realism of a scene by simulating radiosity, or the interreflection of light in a scene.

Global illumination (GI) allows for effects such as color bleeding. For example, if a red countertop is next to a white wall, the white wall gets a slightly pink tint. You might also think it’s a minor detail, but if the pink tint is missing from the image, the image looks fake, even though it might be hard to point out precisely why. This effect is not possible with ordinary ray-tracing calculations.
To calculate global illumination, the renderer uses photon maps, a technique to generate the indirect illumination effects and global illumination. A side effect of using a photon map is rendering artifacts such as dark corners and low-frequency variations in the lighting. You can reduce or eliminate these artifacts by turning on final gathering, which increases the number of rays used to calculate global illumination.
When preparing for a finished rendering, make sure you have specified the drawing units you want to use before you make any GI settings. Changing drawing units after you’re satisfied with the global illumination will adversely affect the rendering results.
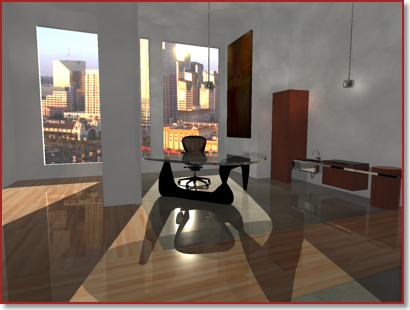
The accuracy and intensity of global illumination is controlled by the number of photons generated, the sampling radius, and its trace depth. This example shows the effects of a low number of photons and a sampling radius set too small.
The intensity of global illumination is computed by the number of photons you’ve specified. Increased numbers of photons makes global illumination less noisy but also more blurry. When the number of photons are decreased, global illumination is more noisy but less blurry. The greater the number of photons, the longer the rendering time.
The sampling radius sets the size of photons. In many cases, the default photon size (Use Radius=off) of one-tenth the scene size gives useful results. In other cases, the default photon size might be too large or too small.
The size of the sampling radius (Radius) determines if photons overlap. When photons overlap, the renderer smooths them together. Increasing the radius increases the amount of smoothing and can create more natural-looking illumination. When photons have a small radius and don't overlap, no smoothing occurs. Ideally, photons should overlap. To get good results, you would want to turn on Use Radius and increase the Radius size.
Global Illumination Trace Depth
The Trace Depth controls are similar to those for calculating reflections and refractions, but they refer to the photons used by global illumination rather than to light rays used in ray-traced reflection and refraction.
The maximum depth limits the combination of reflection and refraction. Reflection and refraction of a photon stops when the total number of both equals the maximum depth. For example, if Max Depth equals 3 and Max Reflections and Max Refractions are both set to 2, a photon can be reflected twice and refracted once, or vice versa, but it can’t be reflected and refracted four times.
The Max Reflections setting specifies the number of times a photon can be reflected. At 0, no reflection occurs. At 1, the photon can be reflected once only. At 2, the photon can be reflected twice, and so on.
The Max Refractions setting specifies the number of times a photon can be refracted. At 0, no refraction occurs. At 1, the photon can be refracted once only. At 2, the photon can be refracted twice, and so on.


