


Customize Tool Palettes
You can add tools to a tool palette with several methods.
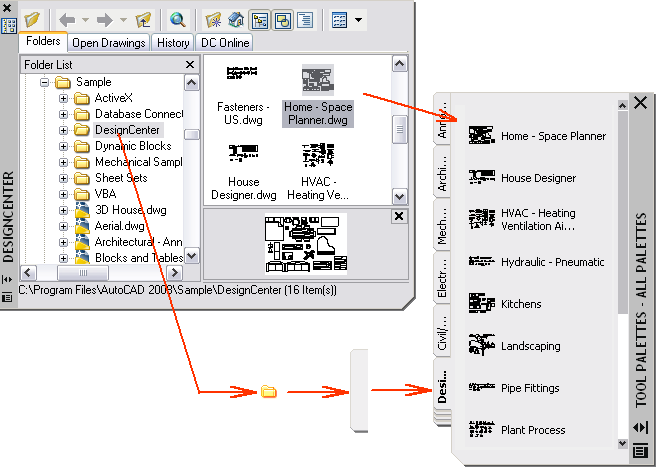
You can create new tool palettes using the Properties button on the title bar of the Tool Palettes window. Add tools to a tool palette with the following methods:
Rearranging Tools and Tool Palettes
Once tools are placed on a tool palette, you can rearrange them by dragging them around or by sorting them. You can also add text and separator lines to tool palettes.
You can move a tool palette tab up and down the list of tabs by using the tool palette shortcut menu or the Tool Palettes tab of the Customize dialog box. Similarly, you can delete tool palettes that you no longer need. Tool palettes that are deleted are lost unless they are first saved by exporting them to a file. You can control the path to your tool palettes on the Files tab in the Options dialog box. This path can be to a shared network location.
If a tool palette file is set with a read-only attribute, a lock icon is displayed in a lower corner of the tool palette. This indicates that you cannot modify the tool palette beyond changing its display settings and rearranging the icons.
To apply a read-only attribute to a tool palette, right-click the tool palette (ATC) file in the following location: C:\documents and settings\<user name>\application data\autodesk\AutoCAD 2008\r17.0\enu\support\ToolPalette\Palettes. On the shortcut menu, click Properties. On the General tab, select Read-only, and click OK.


