


AutoCAD 2008
Network Administrator's Guide > Deploy the
Program > Preliminary Tasks
for a Network Deployment >
Create Shared Folders for Your Deployments
Shared folders are required for both network license and multi-seat stand-alone methods of installation. The shared folder (network share) is created before you run the Installation wizard and is where product deployments are stored.
It is recommended that you name the network share folder Deployments on the desktop of the system where you want deployments stored. You can then add subfolders inside the shared Deployments folder that clearly convey the name of product you plan to deploy. This is also beneficial if you plan to deploy multiple products. For example:
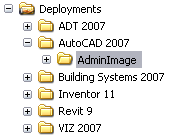
Any subfolders that are placed inside a shared folder are automatically shared.
This is important when creating your deployment images.