


AutoLISP
Developer's Guide > Using the Visual
LISP Environment > Maintaining Visual
LISP Applications > Defining a
Project > Assigning Project
Properties >
Selecting the Files to Include in a Project
There are two tabs in the Project Properties dialog box. In the Project Files tab, you specify the AutoLISP source files for the project.
The project's home directory is identified just below the tabs. This is where the project file (tutorial.prj) resides. In this example, the home directory is c:\My Documents\VisualLISP\Examples. That's not the directory containing the tutorial sample files, though. To identify the source directory, press the [...] button.
Use the Browse for Folder dialog box to identify the location of the project source files. If you select the Lesson5 directory, the Project Properties dialog box looks like the following:
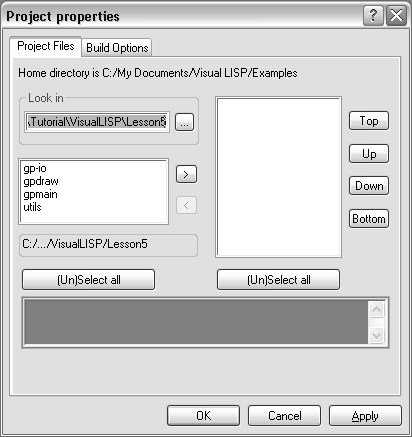
VLISP lists all files in the directory having an .lsp extension (but does not display the extension in the list). The window is designed so that, by default, you can select multiple file names by just choosing each name. You do not have to press and hold CTRL to select more than one file. To clear a selected name, just choose it again.
To include all the listed files in your project, press the button labeled “(Un)Select all,” then choose the right arrow button. VLISP moves the file names to the window on the right:


To remove a file from the project, select the file's name in the right window and click the left arrow button.
