


AutoLISP
Developer's Guide > Using the Visual
LISP Environment > Building
Applications > Making Application
Modules >
Creating a New Application
It is recommended you build your application only after you have fully debugged it. Compiler errors during the Make process may prevent the application wizard from completing successfully.
There are two modes of the Make Application wizard: simple and expert. In the simple mode, you need only identify the files in your application and name the files you want to create. The expert mode allows for many additional options.
To build an executable file with the Make Application wizard
 Make Application New
Application Wizard from the VLISP menu to start the Make
Application wizard. VLISP displays a Wizard Mode dialog box asking
you to choose the mode you want:
Make Application New
Application Wizard from the VLISP menu to start the Make
Application wizard. VLISP displays a Wizard Mode dialog box asking
you to choose the mode you want:
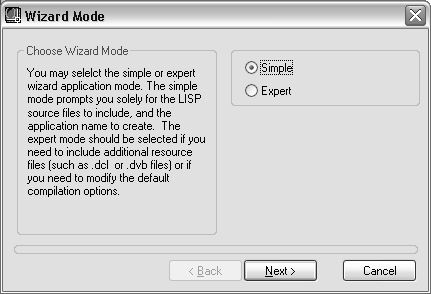
Select Expert mode, so you can see all the possible Make options; then press the Next button.
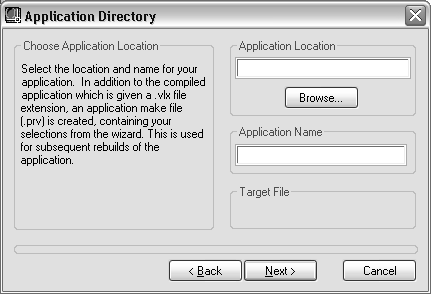
The Application Directory dialog box appears in both the Simple and Expert Wizard modes.
You can enter the full path name in the Application Location field, or press the Browse button and identify the output directory (folder) using a standard Windows dialog box.
The Make Application wizard uses the Application Name when it creates the application executable (.vlx) file and the Make (.prv) file. For example, if you specify an application name of myapp, the Make Application wizard creates files myapp.vlx and myapp.prv.
If you need to go back to a previous Make Application wizard step and change something, press the Back button. Otherwise, press Next to continue.
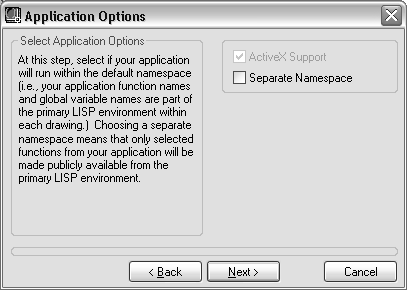
The ActiveX Support option is available if you choose to run your application in a separate namespace. Selecting this option results in automatic loading of AutoLISP ActiveX support functions when the VLX is loaded.
Choose Next to continue building the application.

The LISP Files to Include dialog box appears in both the Simple and Expert Wizard modes.
You can specify AutoLISP source code files, compiled AutoLISP (FAS) files, or a VLISP project file. Click the pull-down button to choose the type of file you want to include, then press the Add button to display the following dialog box for selecting the files:
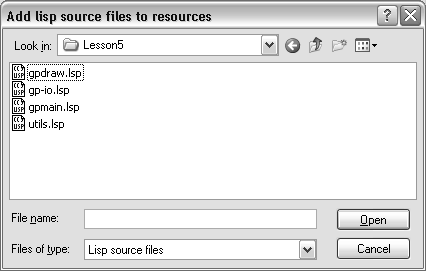
You can select multiple files using the standard Windows file selection methods. After selecting file names, press Open to add the files to your application. To add more files of a different type, choose the file type from the pull-down list and press Add again.
If you specify AutoLISP source files, VLISP compiles those program files when it builds the application. If you specify a project file, all the project's files are compiled and included in the output module. See for information on creating and using project files.
To remove files from the application, select the files you no longer want and press the Remove button. You can also select one or more files, right-click, and choose Remove from the shortcut menu.
VLISP loads the application's files in the order they are listed in the List Files to Include dialog box. You may need to reorder the file list. For example, if you call a function at load time, the function must be defined before it is used. In this case, you want to place the file defining that function first. The List Files to Include dialog box contains buttons you can use to move files around in the list. Select a file name, then choose from among the following buttons:
You can also right-click and choose these actions from a shortcut menu.
Note that the load order of project files is specified when you define the project. (See of the chapter.)
When you have finished specifying your application's AutoLISP files, press Next to continue to the next step in the Make Application wizard.
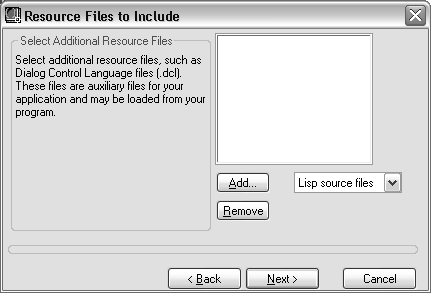
You can specify the following types of resource files:
All program files can be loaded by the VLX. If you choose a Visual LISP project file, all files defined in the project files are compiled and included in the VLX.
Click the pull-down button to choose the type of files you want to include, then press the Add button to display the dialog box for selecting the files. In the file selection dialog box, you can select multiple files using the standard Windows file selection methods. After selecting file names, press Open to add the files to your application.
To add more files of a different type, choose the file type from the pull-down list and press Add again.
To remove resource files from your application, select the files you no longer want and press the Remove button. You can also select one or more files, right-click, and choose Remove from the shortcut menu.
After selecting resource files for your application, press Next to continue the Make Application process.
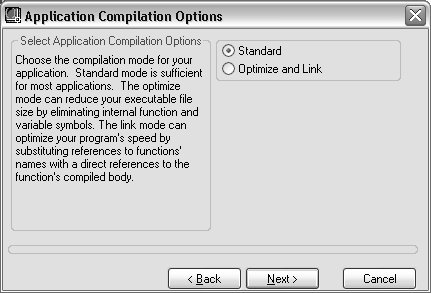
Refer to Choosing a Compiler Mode for information on these options.
After selecting your compilation options, press Next to continue to the final step of the Make Application process.
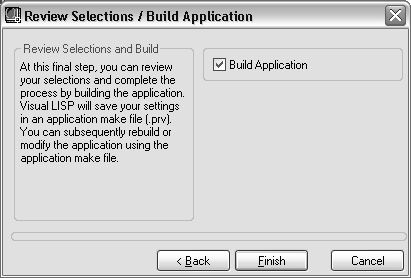
VLISP saves all your application options in a Make (.prv) file. The Make file also includes all the instructions that VLISP needs to build the application. If you do not elect to build the application now, VLISP can use the Make file to build the application later.
Choose Finish to conclude the Make Application process.